Building a Free Blog with GitHub Pages in Minutes
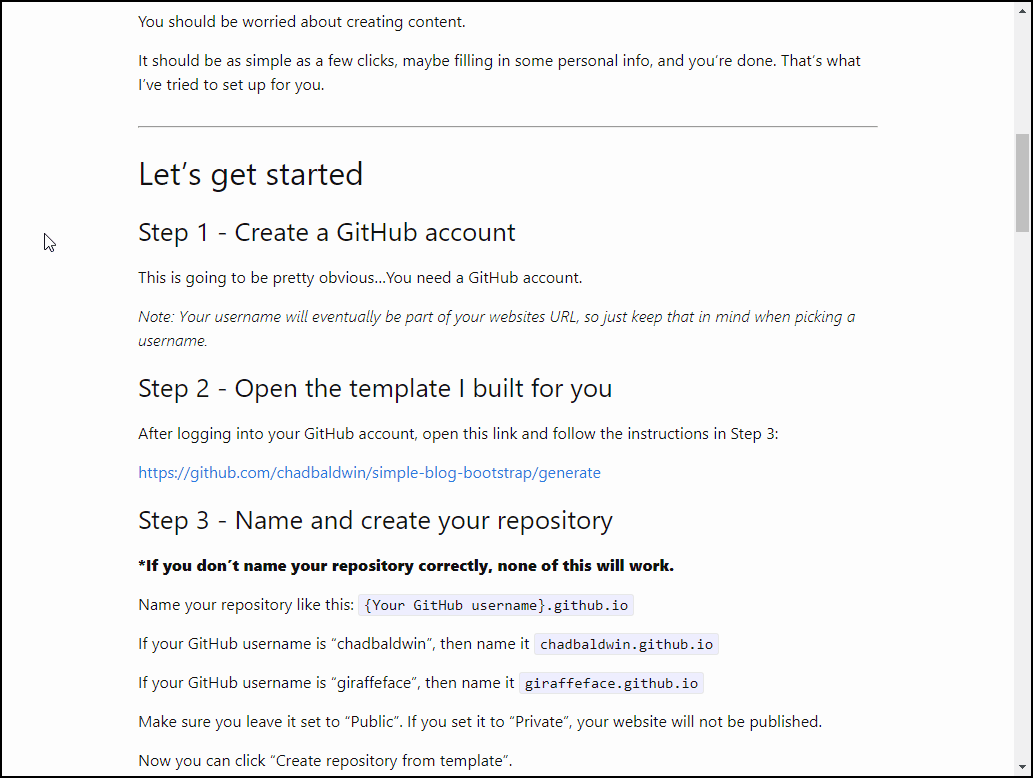
Step 1 - Create a GitHub account
If you don’t have a GitHub account, create one, otherwise go log in.
Note: Your username will eventually be part of your websites URL, so just keep that in mind when picking a username.
Step 2 - Open the template
After logging into your GitHub account, open this link and follow the instructions in Step 3:
https://github.com/chadbaldwin/simple-blog-bootstrap/generate
Step 3 - Name and create your repository
*If you don’t name your repository correctly, none of this will work
Name your repository like this: {Your GitHub username}.github.io
If your GitHub username is “chadbaldwin”, then name it chadbaldwin.github.io
Make sure you leave it set to “Public”. If you set it to “Private”, your website will not be published.
Now you can click “Create repository from template”.
Customization
It’s great and all that you have this fancy blog now…but, you probably don’t want your site saying “Default Author Name” all over the place, and you probably want to change the blogs name to something other than “My Blogs Name”.
In order to edit these things, we’ll need to make some changes to this file: _config.yml
You may or may not have noticed, there’s already a blog post in there. Take a minute to look at it in the browser, maybe even view it on your phone to see how it looks.
Lets create a new blog post
- Navigate to the
_postsfolder on GitHub - Click
Add file>Create new file - Name your file
2026-05-18-your-new-blog-post.md - Set the title of your blog post by using a markdown header
- Write this as the first line
## This is my first blog post
- Write this as the first line
- Add some content…write some random things, whatever you want
Once you save (Commit) the file, after a minute or two your new post will show up on the home page, ready for everyone to read it.